Creating a Drop Shadow
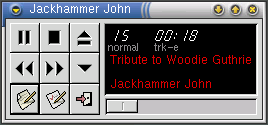
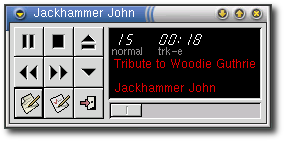
The drop shadow is used to give the screenshot perspective and to set it aside from the normal appearance of the interface, emphasizing that it is in fact a screenshot instead of a piece of the interface. It also gives it a more professional appearance. To see the desired effect, compare the following two screenshots, with and without the drop shadow.
Creating a drop shadow in the GIMP is easy:
-
Load image into GIMP
-
Convert to RGB with Alt-r
-
Select all Ctrl-a and copy Ctrl-c.
-
Create a new image Ctrl-n, and make it about 100 pixels wider and taller than the image to give you some room to work. Make it a transparent background.
-
Paste the image with Ctrl-v and then anchor it with Ctrl-h
-
Create the Shadow by right-clicking on the image and selecting + + + + + + + + +Script Fu+ + + + + + + + + + ->Shadow+ + + + + + + + + + ->Drop Shadow+ + + + + + + + . Use Offset X and Offset Y of 4 and Blur Radius of 9.
-
Merge Layers with Ctrl-m. At the dialog, you probably will want to select Clipped to bottom layer unless you have more work to do, in which case you should select Expanded as necessary.
-
If you have other work to do, such as adding callouts, do this now.
-
Autocrop your image by right-clicking on the image and selecting + + + + + + + + +Image+ + + + + + + + + + ->Transforms+ + + + + + + + + + ->Autocrop+ + + + + + + + .
-
Save the image by right-clicking on the image and selecting + + + + + + + + +File+ ->Save As+ + + + + + + + + + . You will want to save it as a PNG image for use in in the documentation. If you expect to edit this further in the future and have added layers to your image you may want to also save it in XCF format.

