| Linux-Mandrake: |
| User Guide and |
| Reference Manual |
MandrakeSoft
January 2000 http://www.linux-mandrake.com
Before we introduce KDE, it is useful to understand the basis of the graphical interface in Linux and Unix on which KDE is based: X Window System.
X Window System (abbreviated to X) is a project initiated by MIT (Massachusetts Institute of Technology), whose aim was to supply a graphical interface to Unix systems. Today all Unix and Linux systems (with XFree86) use it. X Window System is based on the client/server model. X servers drive the hardware -- graphics card, monitor, keyboard, mouse, pen tablets etc. X clients are all graphical applications. This model provides numerous advantages:
The X Window System itself cannot manage windows: this role is left to a special X client called a window manager. Without a window manager, windows would have no extras (title bars, operating buttons etc.); you would not be able to resize them or place them in the foreground or background, or even hide them (iconify them) unless the application itself asks for it, which would not be very practical. The number of existing window managers is impressive, as is always the case with free software. Some come with Linux-Mandrake, for example, Fvwm, AfterStep, WindowMaker, and the utmost simple, old and venerable Twm.
There remains the most serious problem for the final user: coherence. In fact, the applications communicate to the X server but are totally unaware of each other. A window manager is only aware of the applications in so far as they are windows: it does not know whether the application is a word processor, a terminal or something else. X in itself does not know about Drag'n'Drop, it does not even know icons. And this is where KDE comes in.
KDE provides coherence which is lacking in the X Window System. KDE is a free[1] project initiated by Matthias Ettrich, whose goal is to provide a complete desktop environment for Linux. This goal has been so successful that today KDE is the most widely used desktop environment in the Linux world. It has even penetrated the commercial Unix world where some administrators are happy to use it instead of window managers supplied with their systems!
KDE comes with its own window manager. It also provides all the tools expected by users accustomed to graphical interfaces: a toolbar, a very efficient file manager, contextual menus, balloon help, and drag'n'drop functionality.
KDE also brings some new ideas. The web-oriented desktop is one example, and the possibilities provided by the icons are another. It is also highly intuitive and very configurable. It is a complete working environment that can save you lots of time.
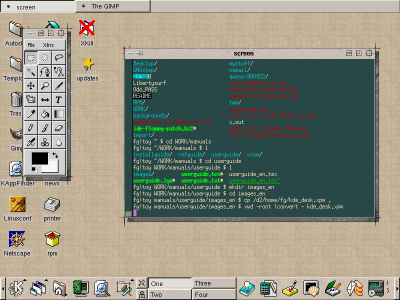
You can see in figure 5.1 a typical KDE desktop with its main components:

Each of these items can be configured. Before going on, we would like to point out a special feature: virtual desktops. This function is widely used in the Unix world and KDE is no exception. In the KDE panel you will find a pager as seen in figure 5.2.
This pager enables you to access all the virtual desktops with one click. Each virtual desktop can have its own windows and settings, and some parameters are unique to each desktop -- for example, the background color or image.
The panel is one of KDE's main features. It is the main application starter and it contains KDE's main menu -- the K menu, which you will easily recognize as shown in figure 5.3.
This menu is divided into three separate sections. From top to bottom you will see:
/usr/share/applnk directory;
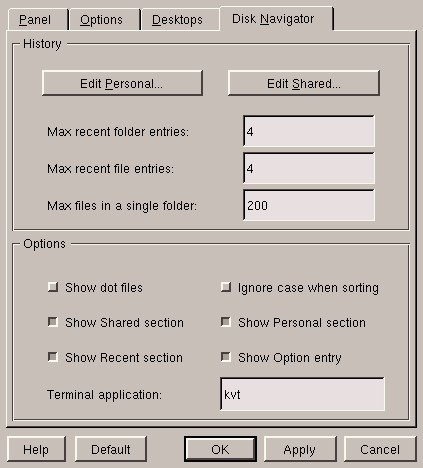
Located in the Panel section of the K menu, you will find many ways to customize the panel and menus. Select Edit Menus to change the KDE menu to your liking, and try Add Application to add your favorite application to the panel. The Configure submenu is sufficiently explicit, but we will come back to the Disk Navigator tab which configures the application of the same name. The Desktops tab only allows you to change the name of the various desktops and the pager size -- you cannot make changes to the desktop numbers here.
The Disk Navigator enables you to quickly navigate through the filesystem by using a menu. This tool can prove to be very practical... if there are not too many files in the directory!
The configuration menu for Disk Navigator
(figure 5.4) can be accessed by choosing
Options... menu. It speaks for itself, as do almost all
KDE's configuration menus. Note that the files which are hidden
in Linux and Unix in general apply to files whose names
begin with the character '.'. If you decide to change your personal
links, you will have to create your entries in a classic KFM
window; we will come back to how to create these entries. You can only
change the overall entries from root!
When you select a directory using Disk Navigator, it will open the directory in a new KFM window. If you select a file, KFM will determine the file type and launch the appropriate application.
If, on the other hand, the type of file is unknown to KFM, you will then have to tell it how to open it, as shown in figure 5.5.

If you select Browser, you will see the list of
KDE menus from which you can select an appropriate program.
Otherwise, you can always enter by hand the name of the program in which
you want to open the file, but you will have to specify the location of
the file in the command line by %f; this is shown in
figure 5.6.

In this case, less, being a program in console mode, you will
also have to tick the option Run in a terminal. You will
also be able to associate a program with a type of file which is unknown
to KFM; we will see how to do so later on in the chapter.
With the control panel, this is the second basic component of KDE. It is an extremely powerful tool, and its possibilities go way beyond those of any existing file managers. It naturally shares all the functions of similar tools:
There are several additional functions which make it extra useful:
You can open a KFM window in at least two ways:
The figure 5.8 displays an example of a KFM window.
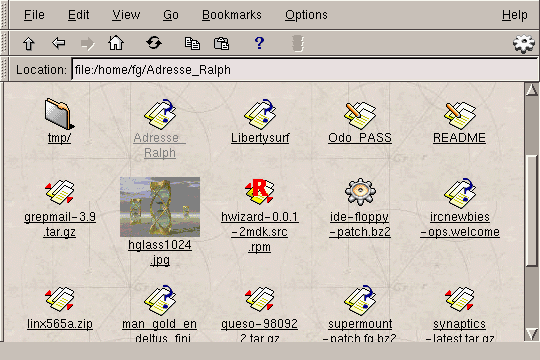
This is probably not the view you will get by default because the
configuration for this window has been changed from the "basic"
configuration. However, some things do not change: you still have a
Location text zone where you can enter the URL to be
consulted, the toolbar and the menu bar. The local files are represented
by URLs whose prefix is file:, so here you can see the contents
of the /home/fg directory. You can already see some of the
characteristics of the manager:
When looking at the window you will have guessed that there is an icon
for the types of files it does not know (in fact, the file
ircnewbies-ops.welcome is a simple text file, but the
.welcome "extension" which, in fact, is not one, makes
it try to find a MIME type corresponding to this sort of file). If
you click on the grepmail-3.9.tar.gz file in this window, for
example, KFM will start the application associated with the
MIME type of the file associated with the "extension"
.tar.gz -- an archiving program.
Let us now look at the basis for configuring KFM -- which can be found in two menus. The first is the View menu, as shown in figure 5.9.
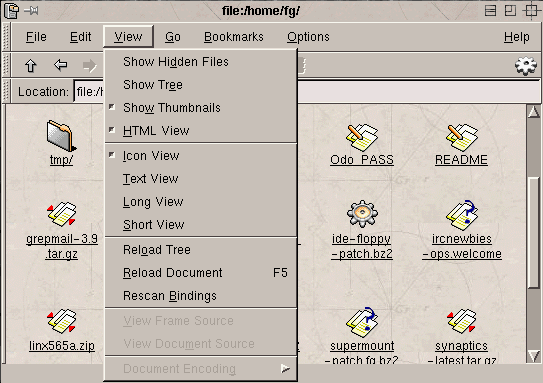
The following options are available:
'.';
enabling this option will display these files (in general, these are
files and/or directories for configuring applications in the user's
personal directory);
index.html in a directory, if one exists. For example, try to
display the contents of the directory /usr/doc/mandrake. If,
however, you do not want to display the HTML directly, you will have
to deactivate this option. To view an HTML file you then have to
click on it with the left button.
The Options menu allows you to customize how the window itself appears. To make any of these changes permanent, choose Save Settings.
Finally, you have a dialogue box where you can configure other aspects of the window manager, obtained by selecting Options/Configure File Manager.... The option titles speak for themselves. In the Other menu, the Allow per-URL settings option applies to the window's options: its size, the display of the various components, etc.
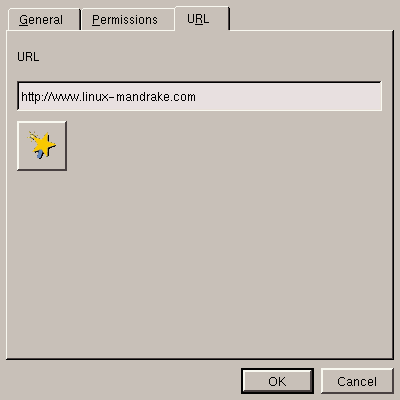
KFM can also browse the Web. Some of the links present on the Linux-Mandrake basic desktop in fact point to web sites: for example, try a right-click on the icon called news and select the URL tab; you will then see the tab of figure 5.10 which is, in fact, a URL designating a web site. After closing this window, now left-click on this link, and you will obtain a KFM window which will load the web site, as shown in figure 5.11!
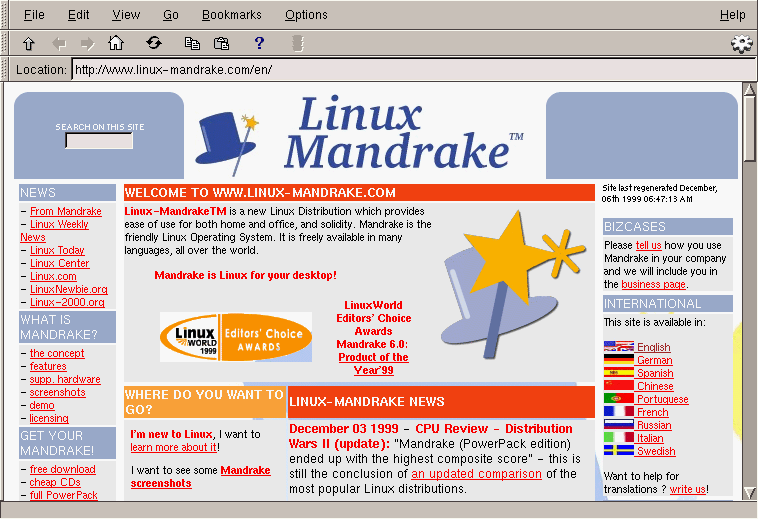
You can see from the appearance of web pages viewed through KFM that it may not be your primary browser choice, but it could come in handy as it uses far less memory than many other web browsers.
For the moment there is no plugin support for KFM, but it does know how to work with MIME types. An example of MIME types is when you click on a link, such as a MPEG file, and the web browser starts the appropriate program to play the file. Or you can save the link to disk by selecting it and dragging it to another KFM window, or even to your desktop!
A very interesting feature of KFM is its ability to function as
an FTP client. A window displaying an FTP site will appear very
similar to how it looks when displaying local files, except that the
Location field will begin with ftp://. Or you can enter
a site address directly -- if it begins with ftp,
KFM will then automatically give it a prefix...
For example, if you enter ftp.ciril.fr in the URL field,
KFM will automatically give it the prefix ftp:// at the
beginning and will effectively then open the corresponding FTP site,
as shown in figure 5.12.
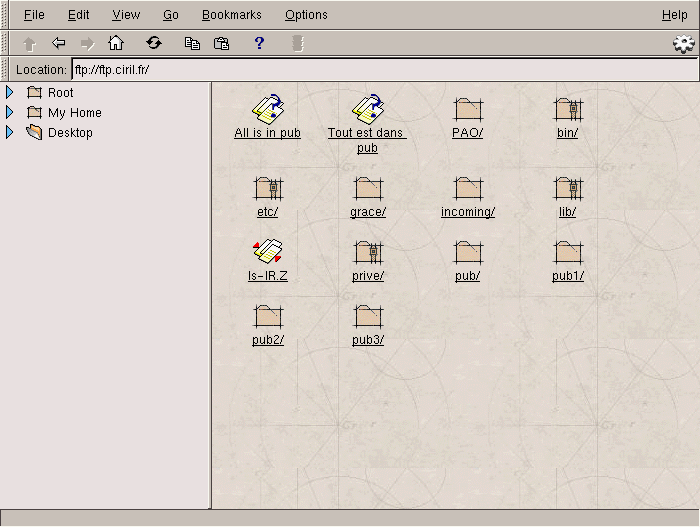
You can see that KFM associates icons in the same way as local directories, and can carry out the same operations for the file types, except that it will first download a copy of the file locally. The directory icons "surrounded with a belt" mean that you do not have access to them, as applies to local directories.
From this sort of window, you can drag and drop and therefore download a file from the FTP site to your personal directory using the icon corresponding to the file!
However, the way that we have structured the URL naturally means that the FTP directory is anonymous, so that you do not have write access to the remote directory. If you have write access to a remote directory via FTP (for example, your ISP provides you with space for a web site, and gives you FTP access to the directory containing your HTML files), you will have to specify your user name on this server, together with the FTP site address, in the form:
ftp://login@remote.site.com/
For example, if your login name is john and the site
name my.isp.com, you will then enter
ftp://john@my.isp.com/ as the URL. A window will appear,
asking you for your password. You can not only drag and drop from your
local directory to the remote directory, but you can also edit your
files on the remote directory locally. After making the changes,
KFM will ask for confirmation before upgrading the file on the
remote site.
The options for configuring these two functions of KFM can be accessed via the menu Options/Configure Browser.... You will see the picture displayed in figure 5.13.
The Proxy screen configures what its name suggests: if you are connected to the Internet and your ISP has a proxy, this is where you can configure it for both FTP and HTTP. The HTTP screen tells the navigator which languages it has to be able to accept from the web sites, as well as the character sets (Cyrillic, Chinese etc.). The default options are generally sufficient.
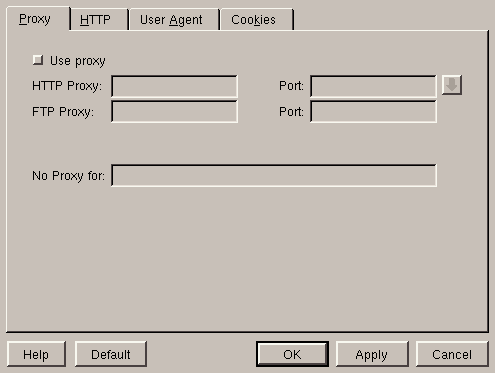
The User Agent screen is a little more "tricky": it
allows to give a false reply when a Web server asks you which
navigator you use. In fact, some sites send different contents depending
on which navigator you use! This tab allows you to get round the
problem. If a page looks different, depending on whether you use
KFM or Netscape, you can enter the name of the server in
the On server: text field, and enter the string
identifying Netscape (Mozilla 4.61) in the
login as: text field, then click on
Add...
As to the Cookies screen, it configures what its name
indicates: the attitude of KFM towards cookies, with the
possibility of specifying a different policy for one or the other site.
As you can see, KFM is a complete web navigator
:)
KDE uses two types of data to associate files with applications: applications on the one hand, and MIME types on the other. Each application is associated with one or more MIME types. When you left-click on an icon representing a recognized type of file, KFM starts the default application associated with this type of file. If you right-click on it, you will see the list of applications associated with this MIME type, below the menu items. The one at the top of the list will be started by default.
MIME is the acronym for Multipurpose Internet
Mail Extensions. At the beginning, MIME types were used to identify
the type of a file attached in an e-mail. A MIME type has the form
main-type/subtype. For example, the image/jpeg
MIME type identifies a JPEG image. Note that a MIME type is
independent of the extension!
The KFM file manager takes over the MIME types in order to associate a description with the files. First of all it uses the file type and its access permission (this is how it recognizes the directories and other special files, see the Reference manual), and if neither of these two items gives it any information, it will place its confidence in the extensions of the file names.
You can edit your MIME types: open a KFM window, and then choose Edit/Mime Types from the menus, to see a list similar to figure 5.14.

For example, let's take the MIME type corresponding to the JPEG
images, that is image/jpeg; go to the image directory for
this, right-click on jpeg and you will get the screen
displayed figure 5.15.
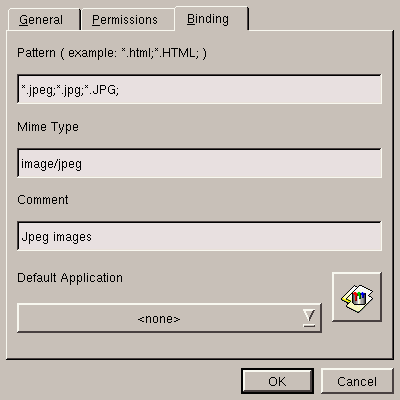
Select the Binding tab. This is where everything happens. The Pattern text field contains the file extensions to be associated with this type. The Mime Type field contains the name of the type and the summary of the type of file.
We are now going to create a MIME type for the LyX files:
KLyX is a word processing program supplied with
Linux-Mandrake, but it is not registered in the list of KDE
applications (we will do this afterwards), and initially we have to be
able to identify the files. These files have the extension
lyx. The type will be called text/x-lyx.
So you have to go into the text directory, and from there
right-click and select New/Mime Type.
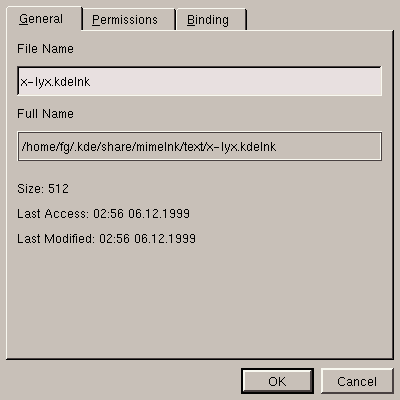
After specifying a name in the New/Mime Type window that
will appear, you can then edit the MIME type as shown in
figure 5.16.
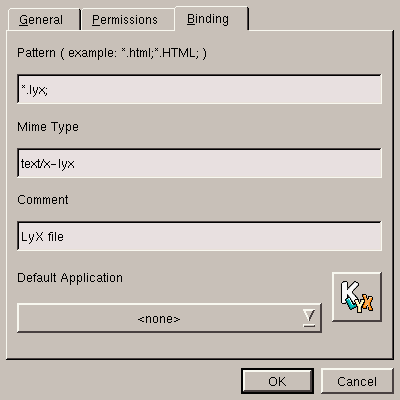
After naming it, you have to tell it which extension the file should normally have, which is done in the Binding tab, shown figure 5.17.
Now you have to declare the application.
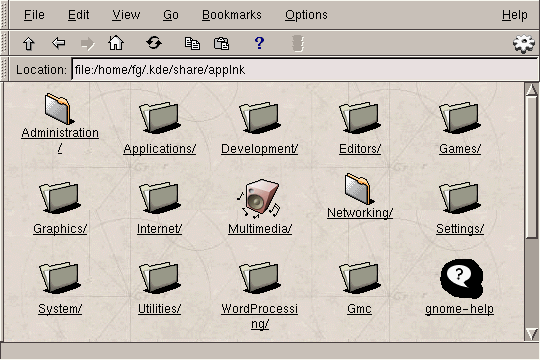
To see the list of applications defined in KDE, you have to start from a KFM window and select Edit/Applications. You will then be taken to the list of applications already available in your personal directory, that will resemble figure 5.18.
To add KLyX to it, right-click on an unoccupied field in the KFM window and select New/Application, as in figure 5.19.
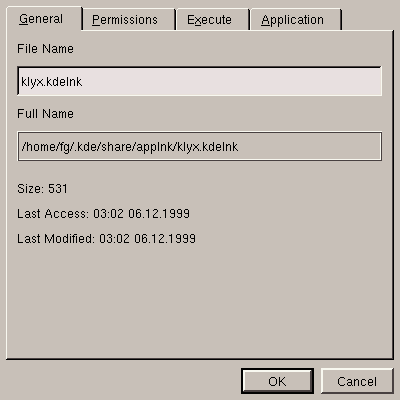
Now that we have created the application name, we have to go to the
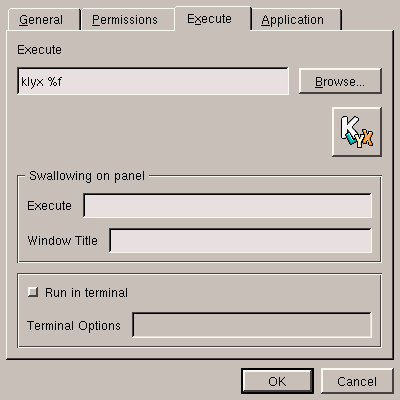
Execute tab and fill in the required fields. Note the
%f in the Execute field: you need it to
designate the location of the file name(s) in the command line; this is
explained in figure 5.20.
Now you have got to the point of associating the application with the
MIME types associated with it. In this case there is only one, which
we have created above -- text/x-lyx, as
figure 5.21 recalls us.
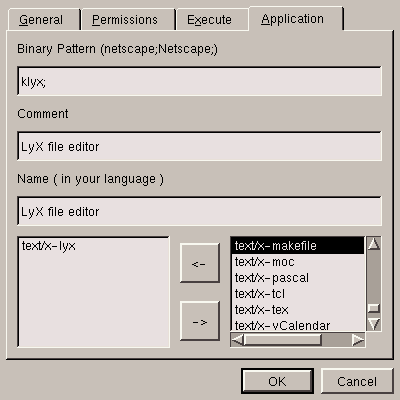
Note that the comment and application name are free.
To confirm creation, click OK. After creating the application, you can now reedit the corresponding MIME type and associate KLyX with it as the default application.
The KDE desktop behaves almost exactly the same way as Windows, although it has extra functionalities:
You also have contextual menus on your desktop. Right-click on an unoccupied desktop field, select Display properties.
As you can see, this screen (shown figure 5.22) configures the desktop background. And this is where the usefulness of virtual desktops begins to become apparent: if you wish, you can select a different background for each desktop (by deselecting the radio button Common background) by selecting each of the desktops in turn. The other options are very similar to those you may be already familiar with from Windows: possibility of selecting a plain background, a gradient one, various arrangements of the background image etc. If you want to have a bit of fun, select a wallpaper at random and make a list of your favorite background images!
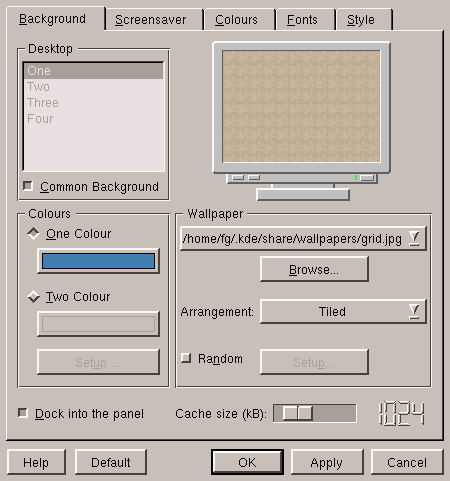
The Screensaver tab configures the screensaver you want for your environment. The menu of figure 5.23 should also look familiar to most of you.
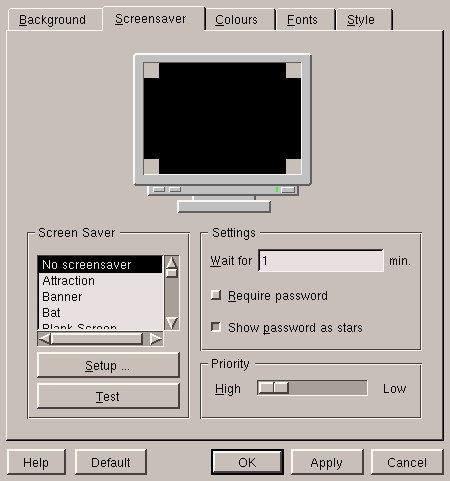
You can select a screensaver from the list on the left, configure it where possible and test it. You can also choose not to have a screensaver at all. Remember that, by default, you will be typing your password blind; if you want to display asterisks for each character you type, you will have to enable the Show passwords as stars option.
As an exercise, we are leaving you to find out what the
Colours and Fonts tabs are used for -- you
shouldn't find that too hard :)
However, the Style tab, shown figure 5.24, is a bit more complex.
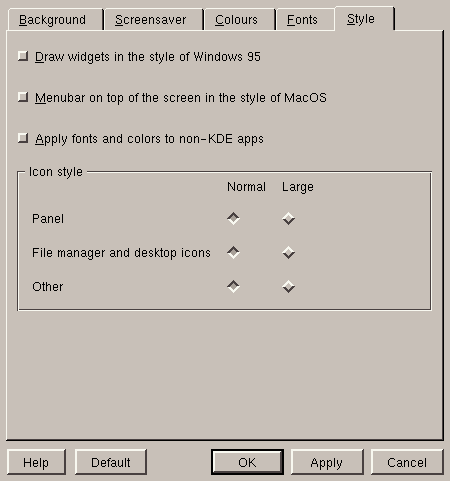
Here is a description of the three radio buttons above:
Finally the bottom frame allows you to select the size of the icons appearing in the control panel (Panel on the desktop and in KFM, (File manager and desktop icons), and in the other (Other) contexts.
Icons are created in the same way as adding an application to KDE applications. To create an icon on the desktop, right-click on an unoccupied field within the desktop and select New/Application; you simply fill in the fields in exactly the same way.
You can also go to the KDE applications list, and drag and drop from the KFM window to the desktop: a menu will ask you if you want to move the file, copy or link it.
Icons themselves are Drag'n'Drop aware, and this is
particularly useful for applications. For example, if you look at the
properties of the printer icon in the Execute tab, you will
see the plain command lpr %f: this simply means that if you
drag an icon representing a file over to the printer icon, KDE
will execute the lpr command with the name of the file
concerned, (%f), which is exactly what we want (lpr
is the program used to print all types of files). You can thus change
the existing icons to provide them with this function. If you bring
over several icons, the names of all the files represented by these
icons will be passed as an argument.
The KDE control center (shown figure 5.25) brings together all the aspects of the KDE configuration. You can access it directly from the K menu.
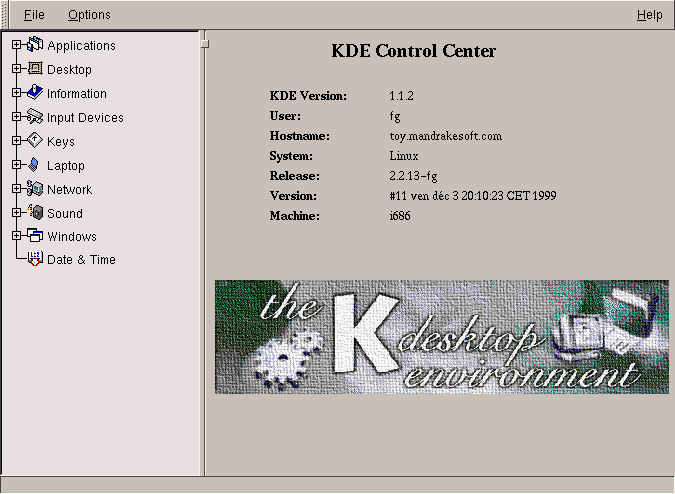
Some of the settings have been mentioned in previous pages so we'll review some of the most interesting aspects.
As its name suggest, this tab allows you to choose a theme for KDE. A theme may contain its own icon design, window buttons, sounds, screen background images and other features. Take the time to try out the various themes available: there are a lot of them.
If you were wondering where the screen power-saving functions were, look no further: they are here. DPMS stands for Display Power Management System, and this is what is used to black out the screen after a certain period of inactivity. If you activate DPMS, do not forget to adjust the various parameters at your convenience.
In this tab, you will find a whole range of information on the system. Note that everything you see here, and more, is available from a terminal.
In this tab, you can adjust the different window parameters at your convenience, from the title bar colors to the type of focus used, via the mouse movements in the windows, the title scroll configuration, the button positions and others. You have a great freedom of choice -- make the most of it!