| Linux-Mandrake: |
| Install Guide |
MandrakeSoft
January 2000 http://www.linux-mandrake.com
The BIOS (Basic Input/Output System) is used to boot up a computer. Specifically, it is used to find the device on which the operating system is located and to start it up. It is also used for the initial configuration of the hardware.
The appearance of plug'n'play and its widespread use means that all modern BIOS can initialize these devices, but you still have to ask it to do so. If your Windows 9x is initializing these devices instead of the BIOS, this will need to be changed for use under Linux.
Changing your BIOS settings is most often performed by holding
down the DEL key during startup. Unfortunately, there are many
types of BIOS in use today and they each have their own
technique, you will need to find out what works for your PC. Once you
are in the BIOS, the option to look for is often called
PNP OS installed (or Plug'n'Play OS installed). Set
this option to No: the BIOS will then initialize any
plug'n'play devices and that can help Linux recognize
some devices in your machine which it would not otherwise.
If your BIOS can boot up from the CDROM and you want to perform a standard installation of Linux-Mandrake (not using Lnx4Win), you can also set your BIOS to boot from the CDROM before searching the hard disk.
If your BIOS cannot boot from the CDROM, you will need to create a bootdisk: the CDROM contains all the files needed to do so. You will also need to create a bootdisk if you wish to use System Commander. If you will be using Lnx4Win you will not need a bootdisk, so you may skip this step and go on to Chapter 5.0, which deals with Lnx4Win.
The boot-up images are in the images directory on the CDROM.
Two files in particular will help you: the files cdrom.img and
txt_boot.img. The first file is the one needed to perform a
graphical installation. If the graphical
installation doesn't work for you, you will have to install using text mode, in
which case, you will need to use the txt_boot.img file.
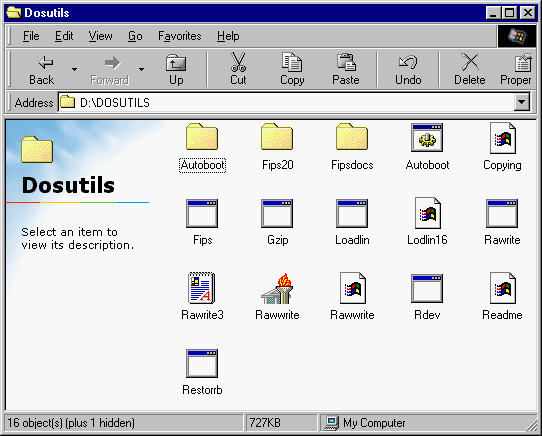
You will need to use the program called rawwrite. This can be
found in
the CD dosutils directory (figure 4.1).

dosutils directoryNote: in this example, the CDROM drive is designated by the
letter D:; you will naturally have to choose the letter
designating the CDROM drive on you machine.
Please note that there is a DOS version, rawrite, of
the same program (it is, in fact, the original version of the program;
rawwrite is merely a graphical frontend to it).
Start the program, as shown in figure 4.2.
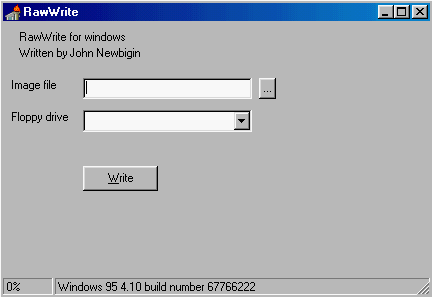
rawwrite programSelect the boot image to copy and the target device (example in figure 4.3).
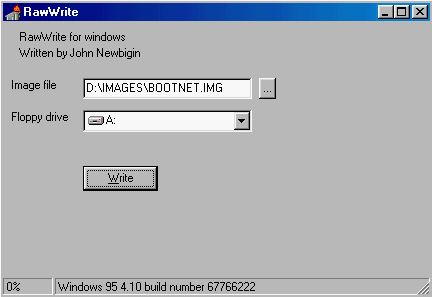
rawriteThen, if you haven't already done so, insert an (empty!) disk into your chosen device and click on Write. You now have a boot disk to install your Linux-Mandrake distribution.
If you already have Linux installed (on another machine, for example, or on that of a friend who has lent you his Linux-Mandrake CD), then carry out the following steps:
/mnt/cdrom;
root;
$ cp /mnt/cdrom/images/cdrom.img /dev/fd0
Replace /dev/fd0 by /dev/fd1, if you are using the second
disk drive and, of course, the name of the image with the one you want.
Your boot disk is now ready.
Linux-Mandrake can handle a large number of hardware devices, and the list is far too long to be quoted in its entirety here. Nevertheless, some of the steps described in this chapter will help you ensure that your hardware is compatible (or not) and, where applicable, to configure some of the problematic devices.
Some types of hardware cannot presently be handled by Linux, either because the support is still in experimental stage, because nobody has written a driver for the devices in question, or because it has been decided that they cannot be supported, for often valid reasons. For example:
Linux's hardware resources are now highly developed, and, apart from the devices mentioned in the previous section, you can expect the rest of your hardware to be accepted, and even more.
However, some types of devices are still having problems with Linux, and, in particular, ISA plug'n'play devices. However you can use Windows to find out their configuration. Right-click on the My Computer icon, choose Properties, select the tab Devices Manager, then select View devices by connection (figure 4.4).
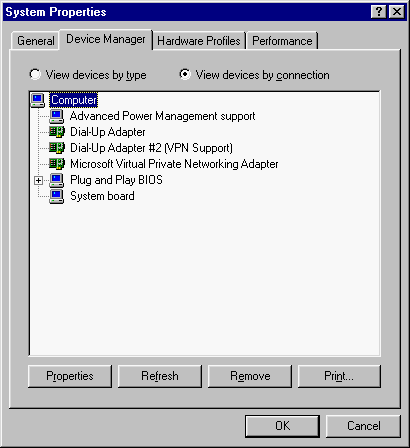
If you have ISA devices, you must view them when you bring up the directory structure (figure 4.5).
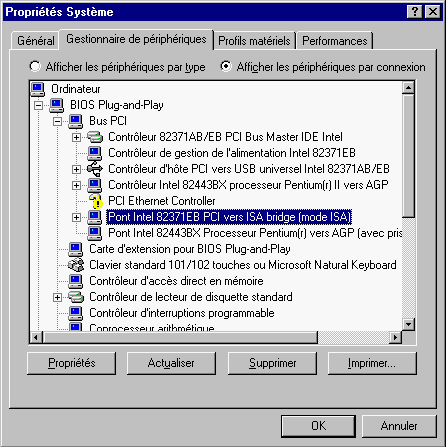
You will be able to find the ISA devices in this part of the directory structure. If you only see one entry for the data port, ignore it. If there are devices present, and if there is no conflict, you can then select and click on the button Properties (figure 4.6).
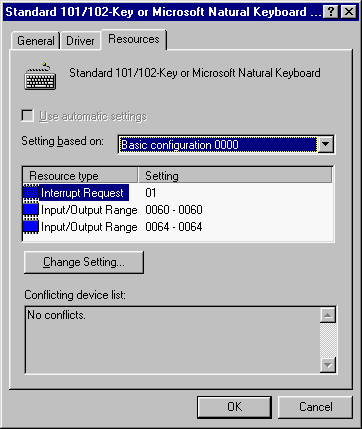
You will have to write down the basic address(es) (Input/output range) used, together with the IRQ(s). Also note down the DMA channel(s) used for the sound cards.
If your ISA card is plug'n'play, you will have to be careful
to configure your BIOS properly, as instructed in the preceding
section but, even if you do so, Linux may not find it. However,
you can disable plug'n'play for the particular device: if the
manufacturer has provided one, you should have a disk containing a
program enabling you to carry out this procedure. Generally, it is the
device's own setup program which does so. If you have this
sort of program, start it up, set the device's configuration with the
parameters used and disable the plug'n'play: Linux can
then see it as soon as it is set up.
Don't worry too much about sound cards, though: you may configure them
after installation, and not during installation. The sndconfig
program uses the isapnp package, which is the only program
under Linux able to handle such devices.