Using GFloppy
Starting GFloppy opens the Main window, shown in .

Don't forget to insert a non-write-protected floppy.
 | WARNING |
|---|---|
|
GFloppy will destroy all files on your floppy! Do not format floppies which contain files you wish to keep. |
Select your file system type. If you need to use your floppy under DOS or Windows, choose DOS (FAT16). Otherwise, choose Linux Native (ext2), since it is technically superior, but cannot be read on most non-Linux machines.
GFloppy needs to know your floppy's density (the amount of data it can hold). Nowadays, most are High Density, 1.44MB 3.5" floppies.
Quick format does not check your floppy for bad "blocks", so it is considerably faster. However, if you have not formatted your floppy before, or suspect it might be bad, you are better off with a regular, slow format.
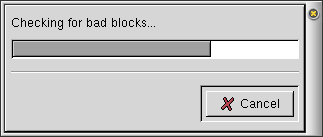
Now, click Format to start formatting your floppy, as shown in the following figures.


Unless you selected Quick Format, GFloppy will check for bad "blocks" on your floppy. If it finds any, your floppy is wearing out and should be replaced.
If all went well, GFloppy will let you know it was successful (), and ask you if you want to format another. If you click Yes, GFloppy will place you back at the main screen, otherwise it will quit.

